> ## Documentation Index
> Fetch the complete documentation index at: https://docs.metriport.com/llms.txt
> Use this file to discover all available pages before exploring further.
# Implementing Webhooks
> Receive data as soon as it becomes available.
## Overview
Usually, when an application wants to consume information from another it makes a request to
obtain such information.
Webhooks turn this around: the producer of information calls the consumer when data is available.
This way, the consumer doesn't have to poll the producer regularly to obtain information.
Metriport will call your app's webhook endpoint when user data is available - there's no way for your
application to request data exposed through webhooks.
To enable this integration approach with Metriport:
1. Expose a public endpoint on your app;
2. Set this endpoint URL on the [Developers page](https://dash.metriport.com/developers) in the developer dashboard,
or via the [Update Settings endpoint](/medical-api/api-reference/settings/post-settings);
3. This will generate a webhook key that should be used to authenticate requests on
your app's endpoint (webhook) - see [authentication](#authentication) and
[generating a new webhook key](#generating-a-new-webhook-key) below.
General requirements for the endpoint:
1. Public endpoint accessible from the internet;
2. Does not do an HTTP redirect (redirects will not be followed);
3. Accepts a `POST` HTTP request;
4. Verifies requests using the HTTP header `x-metriport-signature` - see [authentication](#authentication) below;
5. Responds `200` in under 4 seconds - we recommend processing the webhook request asynchronously;
6. Accepts and responds to a [`ping` message](#the-ping-message);
7. Be [idempotent](https://en.wikipedia.org/wiki/Idempotence) - it should accept being called more
than once with the same payload, with no changes to the end result.
Additionally, your endpoint will need to accept and process different messages when they become available - specifically:
1. [Patient data messages](#medical-api-messages).
**Testing Webhooks**: In sandbox mode, you can test your
webhook integration with realistic patient notification
events (Patient Admit, Transfer, Discharge) using the
dashboard testing tool. Learn more in the [Webhook Testing
section](/medical-api/getting-started/sandbox#webhook-testing)
of our sandbox documentation.
## Authentication
When Metriport sends a webhook message, it includes an `x-metriport-signature` header - this is an
[HMAC](https://en.wikipedia.org/wiki/HMAC) SHA-256 hash computed using your webhook key and the body of the webhook message.
At a high level, an HMAC works by taking a secret key (webhook key from the Settings page) and a message,
and performing iterative hashes of the two to create a signature. That signature is compared against the
signature in the header for equality. If the signatures are equal, you can trust the webhook
payload is authentic and has not been tampered with. If they aren't equal, you should throw it away.
You can use this header to verify that the webhook messages sent to your endpoint are from Metriport.
Avoid parsing the request body before generating the signature - it could result in a slightly
different signature that's enough to invalidate it.
Here's an example of how you can do this in Node.js - see the full sample code
[here](https://github.com/metriport/metriport/blob/develop/samples/typescript-express/src/mock-webhook.ts):
The important thing is to make sure you use a trusted cryptography library in whatever language you
choose to validate the webhook message in.
You can also validate the HMAC in Python - see the full sample code
[here](https://github.com/metriport/metriport/blob/develop/samples/python-fast-api/mock-webhook.py):
```python theme={null}
import hmac
import hashlib
import json
def verify_webhook_signature(key: str, body: str, signature: str) -> bool:
"""
Verify the HMAC signature for a given message and key.
:param key: your webhook key (string).
:param body: the raw body of the webhook request (string).
:param signature: the signature obtained from the webhook request header (string).
:return: True if signature is verified, False otherwise.
"""
key_bytes = key.encode('utf-8')
body_bytes = body.encode('utf-8')
hmac_obj = hmac.new(key_bytes, body_bytes, hashlib.sha256)
computed_signature = hmac_obj.hexdigest()
if hmac.compare_digest(computed_signature, signature):
print('Signature verified')
return True
else:
print('Signature verification failed')
return False
```
### Generating a new webhook key
If using the dashboard: simply delete your webhook URL on the [Developers page](https://dash.metriport.com/developers),
save, and enter it again.
If using the API: set the webhook URL to an empty string via the [Update Settings endpoint](/medical-api/api-reference/settings/post-settings),
and then set it to your desired URL making another request to the same endpoint.
## Format
Webhook requests contain the relevant information on the body of the HTTP request.
There are several types of messages you can expect to receive:
* [`ping`](#the-ping-message): validation of the webhook connection between Metriport and your app;
* [Medical API messages](#medical-api-messages).
Ensure your app responds with an HTTP `200` status code (OK) whenever it successfully receives one of these messages.
There's no need to include anything on the response body.
### The `ping` message
This is a simple message to validate access to your app's webhook endpoint. Your app should
accept a `POST` request with this body...
```json theme={null}
{
"ping": "",
"meta": {
"messageId": "",
"requestId": "",
"when": "",
"type": "ping"
}
}
```
...and respond to this request by sending back the `` as below:
```json theme={null}
{
"pong": ""
}
```
You can check the [webhook mock server available on our repository](https://github.com/metriport/metriport/blob/master/samples/typescript-express/src/mock-webhook.ts)
for a simple implementation of this message.
### Medical API messages
When using the Medical API, Metriport will send Webhook messages containing status updates to your app, as soon
as the data becomes available.
You can see Webhook details specific to the Medical API, including which operations trigger Webhook messages,
on [this page](/medical-api/handling-data/webhooks-with-nq).
### Meta data
Webhook updates will contain meta information.
Example payload:
```json theme={null}
{
"meta": {
"messageId": "",
"requestId": "",
"when": "",
"type": "medical.medical.consolidated-data"
},
...
}
```
The format follows:
Metadata about the message.
The ID for this message from Metriport, useful for debugging purposes only;
The ID of the request that initiated the async flow for this webhook.
The timestamp when this message was originally sent, formatted as [ISO-8601](https://en.wikipedia.org/wiki/ISO_8601)
(example: `2022-12-24T00:46:05.413Z`)
The type of the webhook message. This can either be `ping` or one of our standard
[Webhook event types](/medical-api/handling-data/webhooks-with-nq#webhook-categories).
The additional data you passed to the Metriport API when you called the endpoint related to this Webhook message.
This does not exist in webhooks for [realtime patient notifications](/medical-api/handling-data/realtime-patient-notifications). See more details [here](/medical-api/handling-data/webhooks-with-nq#passing-metadata).
## Retries
Sometimes, due to temporary network disruption (or whatever other reason), a Webhook payload may fail to be delivered
to your app. In these cases, Metriport will store the failed requests, and you can then manually retry them - using
either the dashboard, or the API.
If you do not have the Webhook URL configured, Metriport
will not attempt to deliver Webhook messages for the
Medical API - in which case retries are not applicable.
### Retry Using the Dashboard
On the [Developers page](https://dash.metriport.com/developers) in the dashboard, you're able to see the count of
Webhook requests currently processing, and a count of outstanding ones that failed:
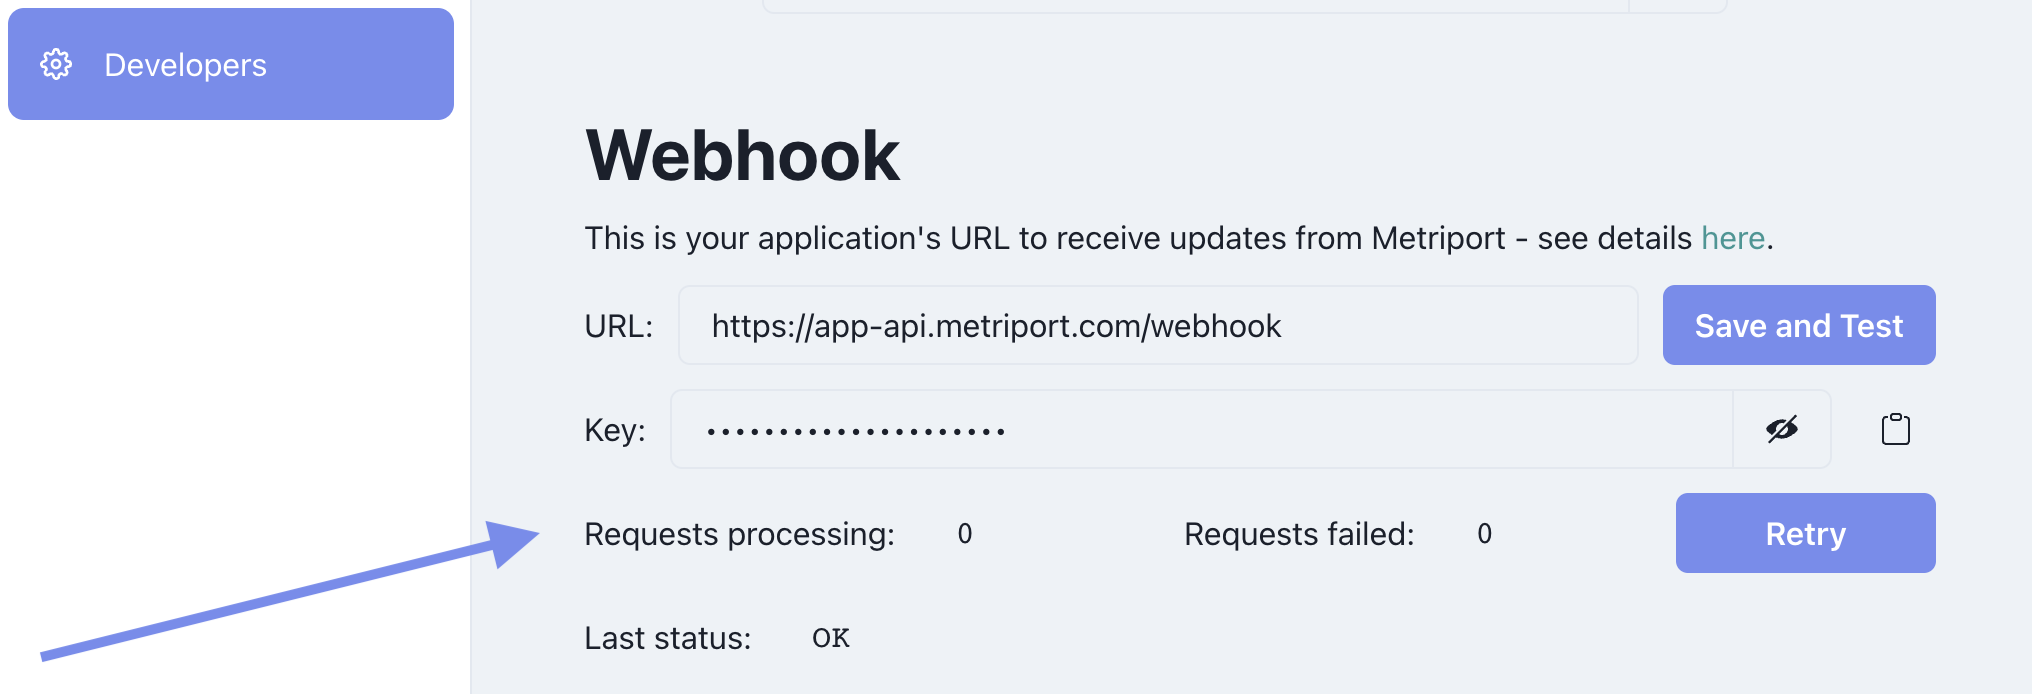 To retry failed requests, simply click the `Retry` button, and those requests will be sent to your app again.
### Retry Using the API
1. Using the [Get Webhook Status endpoint](/medical-api/api-reference/settings/get-webhook), check to see if there are any failed requests;
2. Then, use the [Retry Webhook requests endpoint](/medical-api/api-reference/settings/retry-webhook), to kick off the retry.
Currently, the Metriport API doesn't implement automatic
retries - let us know if this is something you need.
To retry failed requests, simply click the `Retry` button, and those requests will be sent to your app again.
### Retry Using the API
1. Using the [Get Webhook Status endpoint](/medical-api/api-reference/settings/get-webhook), check to see if there are any failed requests;
2. Then, use the [Retry Webhook requests endpoint](/medical-api/api-reference/settings/retry-webhook), to kick off the retry.
Currently, the Metriport API doesn't implement automatic
retries - let us know if this is something you need.